

Whether caused by moving furniture, an accidentally slammed door, or simple wear and tear, unsightly holes and cracks in drywall are an inevitable part of homeownership. For many, repairing drywall feels intimidating, often resulting in lumpy surfaces, visible seams, or patches that fail over time. However, achieving a completely invisible repair—the kind that makes you say it is the best drywall patch ever—is entirely doable when you master the right techniques, use quality materials, and follow a systematic approach. This guide walks you through the essential secrets to creating a seamless, durable drywall repair that blends perfectly into your existing wall.
1. Understanding What Makes the Ultimate Drywall Patch
A superior drywall patch is defined by three fundamental qualities: structural stability, invisible blending, and long-term durability. A quick cover-up job using only spackle over a large hole will eventually sag, crack, or cave in when pressed.
To achieve a flawless, professional-grade finish, your repair must match the thickness and texture of the original wallboard while being properly backed by solid structural support. Whether you are dealing with a tiny nail hole, a medium-sized doorknob dent, or a large structural break, adapting your patching method to the size of the damage is the secret to a repair that lasts a lifetime.
2. Choosing the Right Tools and Materials
Before beginning your repair, assembling the proper tools makes the process smoother and ensures a clean finish. High-quality materials save time and yield far better results than makeshift solutions.
- Joint Compound: For small dings, lightweight spackling compound works well. For medium-to-large repairs, setting-type joint compound (often called “hot mud”) provides superior strength, minimal shrinkage, and fast drying times.
- Patching Mesh or Drywall Tape: Self-adhesive fiberglass mesh tape works exceptionally well for small-to-medium holes, while paper tape delivers ultra-smooth edges for joint seams.
- Backing Wood or Metal Patch Screen: Larger repairs require a sturdy backing, such as a piece of pine wood, plywood strip, or a rigid aluminum patch screen, to prevent flexing.
- Putty Knives: Keep a few sizes on hand—a 2-inch knife for applying compound, and a 6-inch or 10-inch taping knife for feathering the edges out seamlessly.
- Sanding Sponge: A fine-grit sanding sponge or a wet sanding cloth allows for smooth control without producing overwhelming clouds of dust.
3. Step-by-Step Execution for a Flawless Patch
Creating a seamless repair requires patience and careful execution. Following these steps guarantees an unblemished result:
Step 1: Clean and Prepare the Area
Start by trimming away loose paper, frayed drywall fibers, and crumbling gypsum around the edges of the damaged area using a sharp utility knife. Creating clean, firm edges gives the joint compound a solid surface to adhere to.
Step 2: Install Solid Backing for Larger Holes
For holes larger than a few inches, cut a small wooden strip or offcut that is longer than the hole itself. Insert it behind the drywall and secure it in place by driving drywall screws through the existing wall into the wood. This provides a rigid framework that keeps your patch from moving or sinking.
Step 3: Cut and Fit the Patch
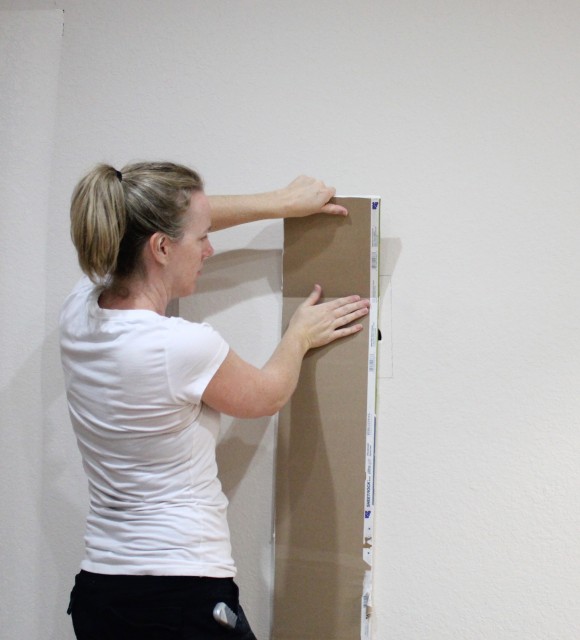
Cut a piece of fresh drywall to fit the opening precisely. Screw the new piece into your wooden backing board so it sits perfectly flush with the surrounding wall surface.
Step 4: Apply Tape and First Coat of Compound
Place self-adhesive fiberglass mesh tape or paper tape over the seams surrounding the patch. Apply a thin layer of joint compound over the tape using your putty knife, pressing firm enough to fill any gaps while wiping away excess compound. Allow this base coat to dry completely.
Step 5: Feather the Edges
The key to making a patch invisible is “feathering”—spreading the joint compound out several inches beyond the repair area while tapering the edges down to zero thickness against the original wall. Apply a second, wider coat of compound, sweeping outward with your taping knife. Feathering creates a subtle slope that tricks the eye, making the repair undetectable once painted.
4. Sanding, Texturing, and Priming Secrets
The final finishing steps determine whether your patch disappears completely or remains an obvious bump on the wall.
- Gentle Sanding: Once the final coat is thoroughly dry, sand the area lightly using a fine-grit sanding sponge. Use smooth, circular motions around the edges to blend the patch into the surrounding drywall smoothly. Avoid sanding too aggressively over the tape line.
- Matching Wall Texture: If your wall has an existing texture (such as orange peel or knockdown), apply a matching spray texture before painting. Test the texture spray on a piece of cardboard first to adjust the nozzle for an exact match.
- Always Prime Before Painting: Drywall compound is highly porous and absorbs paint differently than the surrounding painted wall—a phenomenon known as “flashing.” Applying a coat of quality drywall primer seals the patch, ensuring your topcoat of paint lays down with uniform color and sheen.
Conclusion
Creating the best drywall patch ever is not about rushing through a quick fix; it is about building a strong foundation, feathering compound smoothly, and taking the time to match texture and paint finish properly. By preparing the area carefully, backing larger holes securely, and applying thin, feathered coats of joint compound, you can erase wall damage completely. With these simple techniques and a bit of patience, your walls will look as smooth, solid, and flawless as the day they were built.